Contents
- 1 Your Denim, Your Style
- 2 Things You Need to Get Going
- 3 Steps for Making Ripped Jeans at Home
- 4 How to Care for Them After You Rip Them
- 4.1 Frequently Asked Questions
- 4.1.1 1. Is it okay to wear new jeans?
- 4.1.2 2. What type of scissors should I use?
- 4.1.3 3. Will the holes get bigger after washing?
- 4.1.4 4. Is it okay to use bleach for style?
- 4.1.5 5. How long does it take to rip a pair?
- 4.1.6 6. Do you have any safety tips?
- 4.1.7 7. Do you need sandpaper?
- 4.1.8 8. Is this something kids can do?
- 4.1.9 9. Is it possible to fix a rip if I don’t like it?
- 4.1.10 10. Will this hurt the fabric too much?
- 4.2 Related Articles
- 4.1 Frequently Asked Questions
Your Denim, Your Style
Have you ever thought, “I wonder if I can make these old jeans into ripped jeans that are in style without buying a new pair?” The good news is that it’s not only fun, but also surprisingly easy to make ripped jeans at home. You don’t need much more than some time, some creativity, and some simple tools you already have.
Things You Need to Get Going
Before you learn how to make ripped jeans at home, you need to have these things:
- One old pair of jeans in any fit or colour
- Sharp scissors
- Medium grit sandpaper
- Tweezers
- A pencil or white chalk
- A thick piece of cardboard or a cutting board
- A razor or cheese grater is optional
When you learn how to make ripped jeans at home, these are more than enough to help you get the look you want.
Steps for Making Ripped Jeans at Home
Step 1: Choose the Right Jeans
Pick a pair that fits well but looks old or boring. Medium-wash or light-wash jeans are best for making ripped jeans at home because the frays show up better.
Step 2: Mark the Part That Will Tear
Put on the jeans and mark where you want the holes to be. Use a pencil or white chalk to draw the outline. People like to go to their knees and thighs. This is a very important step in making ripped jeans at home because the design depends on getting the placement right.
Step 3: Put Cardboard In
To keep from cutting through the back of the jeans, put a piece of thick cardboard or a cutting board inside. If you don’t do this, you might wish you had later. This step is very important for making ripped jeans at home.
Step 4: Cut Across the Grain
Use scissors to cut two to three horizontal lines inside the marked area. The lines should be 1 inch apart and 2 to 5 inches long, depending on how you want them to look. When you learn how to make ripped jeans at home, remember that less is more at first.
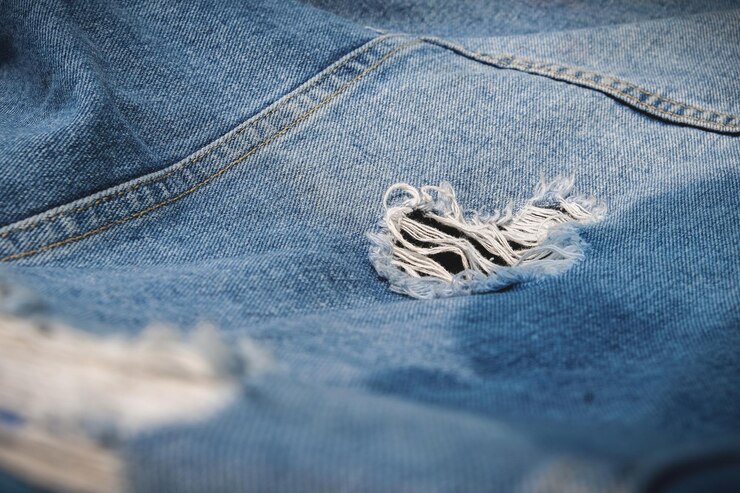
Step 5: Make the Fabric Fray
Use sandpaper to rough up the edges along the cut lines. Then, use tweezers to pull out the blue threads that go up and down, but leave the white ones. This makes it look old and webby. People who want to learn how to make ripped jeans at home love this trick.
Step 6: Add Some Texture to It
Use a cheese grater or razor to lightly wear down other areas, such as near the cuffs or pockets. Don’t go too far. The soft feel of these jeans gives them a natural look, which shows that you really know how to make ripped jeans at home like a pro.
Step 7: Put Them On
Put them on and see how they look. If you need to, change the cuts or add more distress. You need to be confident in order to learn how to make ripped jeans at home.
How to Care for Them After You Rip Them
You need to take care of your ripped jeans the right way now that you know how to make them. Always wash them gently in cold water and don’t put them in the dryer. If you’re not careful, the rips can get bigger.
This is a step-by-step video guide. Want to learn by seeing? This tutorial is very helpful because it shows you exactly how to make ripped jeans at home.
Less Spending, More Style
You don’t have to buy expensive designer jeans anymore; you’ve just learnt how to make ripped jeans at home. You can always make your denim unique and expressive by cutting it however you want, from knee cuts to distressed thighs.
Even fashion experts say that doing things like making ripped jeans at home can make your outfits more unique.
Last Thoughts on Custom Denim
Once you learn how to make ripped jeans at home, you might want to rip up all of your old jeans. That’s how addicting it is. It lets you be creative and have fun, and your jeans now tell a story—your story.
Frequently Asked Questions
1. Is it okay to wear new jeans?
Yes, but it’s easier to rip older jeans when you learn how to do it at home.
2. What type of scissors should I use?
When learning how to make ripped jeans at home, sharp fabric scissors are the best way to get clean cuts.
3. Will the holes get bigger after washing?
Yes, a little bit. That’s why it’s important to wash them gently after you learn how to make ripped jeans at home.
4. Is it okay to use bleach for style?
Bleach can add highlights, but only use it sparingly after you learn how to make ripped jeans at home.
5. How long does it take to rip a pair?
For beginners learning how to make ripped jeans at home, it takes about 30 to 45 minutes.
6. Do you have any safety tips?
Don’t touch the blades with your fingers. A safe place to work is very important when making ripped jeans at home.
7. Do you need sandpaper?
Yes, it makes the frayed look. This is a useful tip for making ripped jeans at home.
8. Is this something kids can do?
Yes, but only with supervision. Making ripped jeans at home together is a fun thing for the whole family to do.
9. Is it possible to fix a rip if I don’t like it?
It helps to sew patches on the bottom. When you first learn how to make ripped jeans at home, you will probably make mistakes.
10. Will this hurt the fabric too much?
Not if you do it right. That’s why it’s so important to know how to make ripped jeans at home the right way.
For more DIY fashion tips, you can visit Instructables.