Contents
A Bond Woven with Threads and Emotions
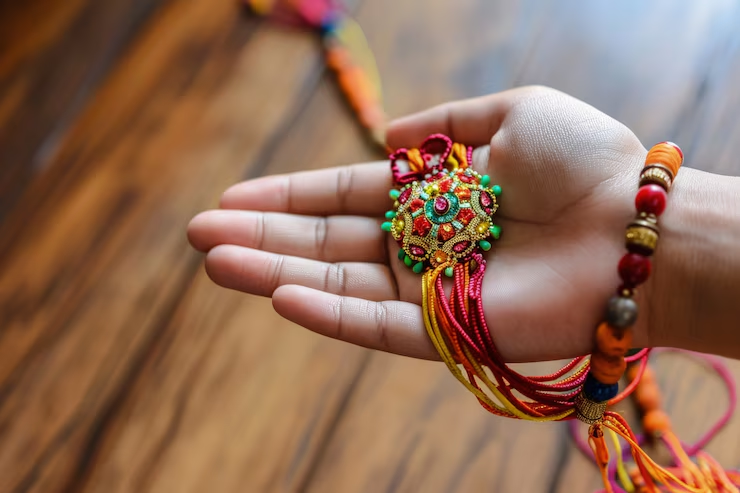
Rakhi isn’t just a string. It’s an emotion tied with love, laughter, and childhood memories. While shops are filled with colorful options, nothing beats the charm of a homemade rakhi. If you’ve ever searched how to make rakhi at home, this guide brings everything together. From understanding the reasons behind it to the actual preparation steps, you’ll find all you need to know here.
Why People Prefer Making Rakhi at Home
There are many reasons why crafting a rakhi at home has become popular. Firstly, it adds a personal touch. Secondly, homemade rakhi is safe for sensitive skin, especially for kids. Third, it’s cost-effective and fun. But more than anything, it’s about love. Knowing how to make rakhi at home can turn into a delightful activity shared between siblings or even parents and children. Explore more about Raksha Bandhan celebrations here.
Materials You’ll Need
Before starting, collect your materials. You don’t need to spend much. Most of these items are already lying around at home. Here’s how to make rakhi at home using simple things:
-
Cotton threads or silk threads (about 2 meters)
-
Beads, buttons, small sequins
-
Felt cloth or foam cut-outs (2 pieces, 2-inch each)
-
Scissors and glue
-
Decorative lace or ribbon (1 foot)
-
Safety pin or needle
This is the basic quantity you’ll need to make one rakhi. You can scale this up depending on how many you want to prepare. Shop for DIY craft materials here.
Step-by-Step: How to Make Rakhi at Home
Now comes the exciting part. Let’s begin crafting your own rakhi in a few simple steps.
Step 1: Preparing the Thread
Take the silk or cotton threads and cut them to about 18 inches. This will allow enough length to tie around the wrist. Fold them into half and twist them tightly. Knowing how to make rakhi at home starts with choosing the right thread.
Step 2: Creating the Base
Use felt cloth or foam to create a round or floral base. You can use a bottle cap as a stencil. Cut out two similar pieces. This step is important in how to make rakhi at home because it forms the centerpiece for decorations.
Step 3: Decorating the Rakhi
This is where you can get creative. Stick beads, small mirrors, or sequins on the base. You can also glue on a cute button or symbol. Learning how to make rakhi at home gives you the freedom to design however you want.
Step 4: Attaching the Thread
Glue or sew the twisted thread on the back of the decorative base. Cover the glued thread end with the second foam or felt piece for neatness. This step is often skipped, but it ensures a clean finish when mastering how to make rakhi at home.
Step 5: Final Touches
Use glitter glue or outline pens to add a little sparkle. Let it dry completely before tying. Congratulations, you’ve just learned how to make rakhi at home!
Other Creative Ideas for Rakhi
You can also use wool, embroidery floss, or even friendship band threads. If you’re making rakhi for kids, try cartoon themes. Use smiley stickers or animal-shaped foam. Want to keep it eco-friendly? Use dried leaves, jute threads, or paper flowers. All these fall under fun variations of how to make rakhi at home.
Quantity Guide for a Rakhi-Making Session
Planning to make rakhis for your cousins, friends, or a community event? Here’s a rough estimate:
-
For 5 rakhis: 10 meters of thread, 10 felt pieces, 30 beads
-
For 10 rakhis: 20 meters of thread, 20 felt pieces, 60 beads
This quantity ensures you don’t run short. Bulk making helps when you learn how to make rakhi at home for others too. Check for bulk craft supplies here.
Benefits of Handmade Rakhi
Apart from love and savings, handmade rakhis create memories. The process also boosts creativity in kids. It’s not just about tying a thread; it’s about bonding. That’s the hidden beauty in how to make rakhi at home.
H6: Bonus Tip
Use scented oils to lightly dab your rakhi with fragrance. It gives an aromatic surprise. You won’t find this in store-bought options, which is why many still ask how to make rakhi at home for that special touch.
FAQs on How to Make Rakhi at Home
Q1. Can I make rakhi at home using paper?
Yes, you can. Craft paper or quilling paper makes a great decorative top for a rakhi.
Q2. What thread is best for a homemade rakhi?
Cotton, silk, or embroidery threads work best. Choose skin-friendly ones.
Q3. Can kids learn how to make rakhi at home?
Absolutely! Just supervise while using scissors or glue.
Q4. How long does it take to make one rakhi?
Around 15 to 20 minutes, depending on your design.
Q5. What glue is safe for rakhi crafting?
Fabric glue or craft glue works well. Avoid using super glue for kids.
Q6. How do I store the rakhis if I make them early?
Keep them in a dry, airtight box away from sunlight.
Q7. Can I recycle materials while making rakhi?
Yes, reuse beads, ribbons, and buttons from old clothes or accessories.
Q8. Is there a no-glue method for how to make rakhi at home?
Yes, you can sew the decorations if you’re avoiding glue altogether.
Q9. Can I use wool instead of thread?
Yes, wool is a soft and vibrant alternative for making rakhis.
Q10. How to make rakhi at home for a baby?
Use very soft materials like felt, satin ribbon, and avoid beads that could fall off.


